
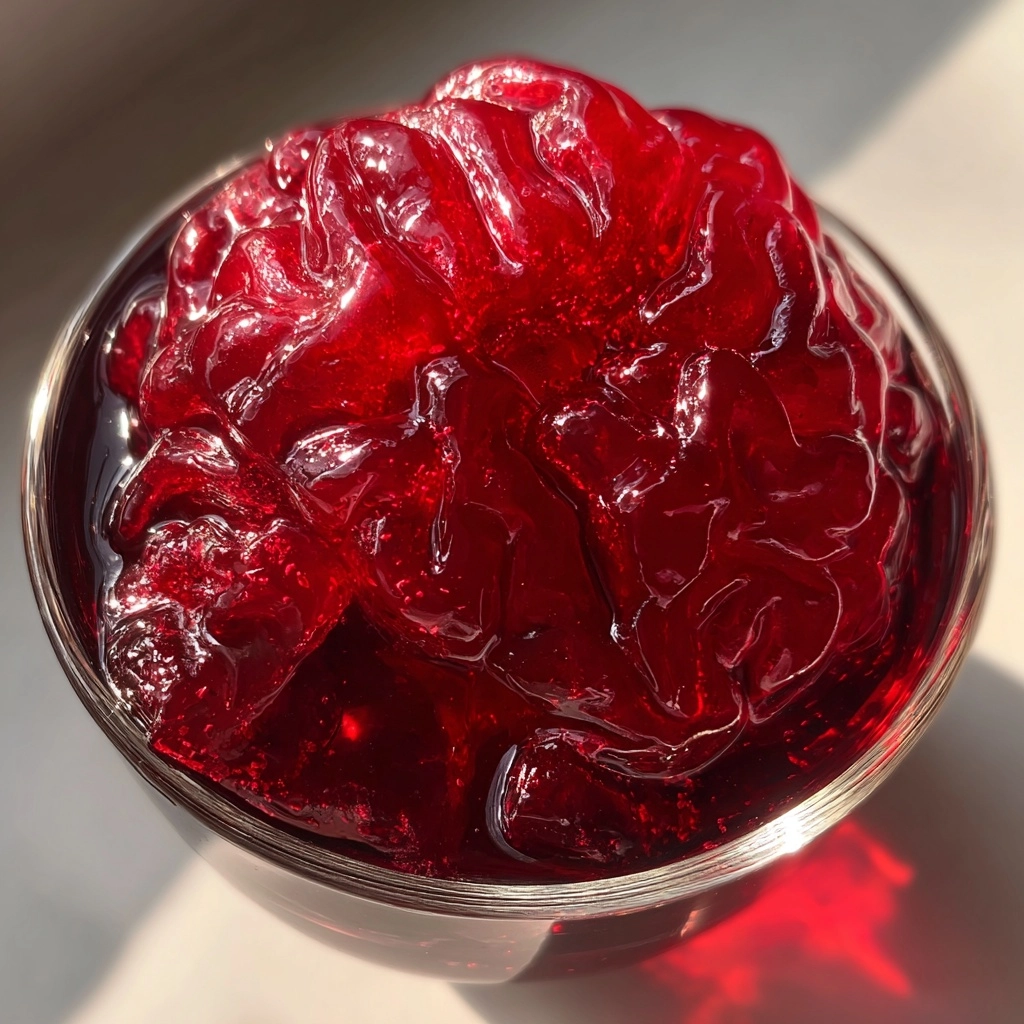
Zombie Brain Jello (Gluten-Free)
As a busy mom, I know how important it is to whip up something fun and memorable without spending hours in the kitchen. That’s where this Zombie Brain Jello (gluten-free) comes in! It’s a delightful treat that not only looks spooky but also tastes delicious. Perfect for Halloween parties or just a fun family night, this recipe is a quick solution to impress your loved ones. Plus, it’s gluten-free, so everyone can enjoy it without worry. Let’s dive into this easy and entertaining recipe that will surely be a hit!
Why You’ll Love This Zombie Brain Jello
This Zombie Brain Jello is not just a treat; it’s a showstopper! It’s incredibly easy to make, taking only 15 minutes of your time. With just a few simple ingredients, you can create a spooky dessert that will have everyone talking. Plus, it’s gluten-free, making it a safe choice for guests with dietary restrictions. The combination of raspberry flavor and whipped cream adds a delightful twist that’s sure to please both kids and adults alike!
Ingredients for Zombie Brain Jello
To create this spooky delight, you’ll need a few simple ingredients that pack a punch of flavor and fun. Here’s what you’ll gather:
- Raspberry gelatin: This is the star of the show! It gives the jello its vibrant color and sweet-tart flavor.
- Boiling water: Essential for dissolving the gelatin, it helps create that perfect, wobbly texture.
- Cold water: This balances the temperature and helps the jello set properly.
- Whipped cream: A fluffy topping that adds a creamy contrast to the jello. It’s like a cloud on your spooky treat!
- Gummy worms (optional): These creepy crawlers are a fun addition, making your jello look even more like a brain. Kids love them!
For those looking to switch things up, consider using a different flavor of gelatin, like lime or orange, for a unique twist. Just make sure to check that your gelatin is gluten-free. You can find gluten-free options at most grocery stores or online. If you want to amp up the flavor, a splash of fruit juice can add a delightful zing!
Exact quantities for each ingredient are available at the bottom of the article for easy printing. Happy jello-making!
How to Make Zombie Brain Jello
Making Zombie Brain Jello is a breeze! Follow these simple steps, and you’ll have a spooky treat ready in no time. Let’s get started!
Step 1: Dissolve the Gelatin
Begin by boiling one cup of water. In a mixing bowl, pour the boiling water over the raspberry gelatin. Stir it well until the gelatin is completely dissolved. This step is crucial for that smooth texture we all love!
Step 2: Add Cold Water
Next, add one cup of cold water to the gelatin mixture. This helps cool it down and ensures it sets properly. Give it a good stir to combine everything evenly. You want a nice, consistent mixture!
Step 3: Pour into Mold
Now, it’s time to pour the mixture into your brain-shaped mold. Make sure to do this slowly to avoid spills. If you don’t have a brain mold, any fun shape will do! Just remember, the spookier, the better!
Step 4: Refrigerate
🚫 Don’t Buy This If…
- ❌ You hate hosting fun parties
- ❌ You don’t like saving time in the kitchen
- ❌ You only want boring, basic recipes
✅ What You’ll Get:
- ✅ 63 spooky & delicious Halloween recipes
- ✅ Creepy treats, eerie snacks, scary drinks & more
- ✅ Kid-friendly & adult-approved
- ✅ 📥 Instant digital download – start cooking today!

Place the mold in the refrigerator and let it chill for at least four hours. This is where the magic happens! The jello will firm up, transforming into a brain-like treat. Patience is key here!
Step 5: Remove from Mold
Once the jello is fully set, carefully remove it from the mold. You can run a knife around the edges to help it release. Gently flip it over onto a plate. It should come out smoothly, revealing your spooky creation!
Step 6: Decorate and Serve
Finally, it’s time to add the finishing touches! Top your Zombie Brain Jello with a generous dollop of whipped cream. For an extra creepy effect, sprinkle some gummy worms on top. Your guests will be both impressed and delighted!
Tips for Success
- Always check the gelatin package to ensure it’s gluten-free.
- For a smoother texture, let the boiling water cool slightly before mixing.
- Use a non-stick spray on the mold for easier removal.
- Experiment with different flavors of gelatin for a fun twist.
- Make it a day ahead to save time on party day!
Equipment Needed
- Mixing bowl: Any large bowl will do, even a pot if you’re in a pinch.
- Whisk or spoon: A simple spoon works just as well for stirring.
- Brain-shaped mold: If you don’t have one, use any fun-shaped mold.
- Refrigerator: Essential for setting the jello.
Variations
- Flavor Swaps: Try using lime or orange gelatin for a different taste experience. Each flavor brings its own unique twist!
- Fruit Add-ins: Mix in some chopped fruit like strawberries or blueberries for added texture and flavor. They can also make the jello look even more festive!
- Vegan Option: Substitute gelatin with agar-agar for a plant-based version. Just follow the package instructions for the right ratios.
- Colorful Layers: Create a layered effect by letting each layer set before adding the next. Use different flavors for each layer to surprise your guests!
- Spooky Additions: Add edible glitter or spooky sprinkles on top for an extra festive touch. It’s all about the presentation!
Serving Suggestions
- Pair your Zombie Brain Jello with spooky-themed cupcakes for a complete Halloween dessert table.
- Serve with a side of fruit salad for a refreshing contrast to the sweet jello.
- Offer a fun punch or themed drinks to complement the spooky vibe.
- Present on a decorative platter with Halloween decorations for added flair.
FAQs about Zombie Brain Jello
As you prepare to make this spooky treat, you might have a few questions. Here are some common queries about Zombie Brain Jello (gluten-free) that can help you out!
Can I make Zombie Brain Jello in advance?
Absolutely! In fact, making it a day ahead is a great idea. It allows the jello to set perfectly and saves you time on the day of your event.
Is Zombie Brain Jello suitable for kids?
Yes! This fun dessert is perfect for kids. Just be mindful of any allergies, especially with the gummy worms. They’ll love the spooky look and delicious taste!
Can I use a different flavor of gelatin?
Definitely! While raspberry is a classic choice, feel free to experiment with lime, orange, or even grape gelatin. Each flavor adds its own unique twist to the treat!
How do I store leftover Zombie Brain Jello?
Store any leftovers in an airtight container in the refrigerator. It should stay fresh for up to three days, but I doubt there will be any left!
What if I don’t have a brain-shaped mold?
No worries! You can use any fun-shaped mold you have on hand. Just remember, the spookier, the better! Get creative!
Summarizing the Fun of Zombie Brain Jello
Creating Zombie Brain Jello (gluten-free) is more than just making a dessert; it’s about crafting memories with your loved ones. The laughter and excitement as you unveil this spooky treat will light up any Halloween gathering. It’s a simple yet impressive way to bring a little fun into your busy life. Plus, the joy of seeing kids’ faces light up when they dig into this wobbly, brain-shaped delight is priceless. So, gather your ingredients, unleash your creativity, and enjoy the delightful chaos that comes with making this festive treat. Happy jello-making!
Print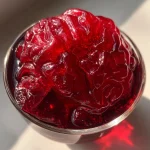
Zombie Brain Jello (Gluten-Free) for Spooky Treats!
- Prep Time: 15 minutes
- Cook Time: 0 minutes
- Total Time: 4 hours 15 minutes
- Yield: Serves 8
- Category: Dessert
- Method: Refrigeration
- Cuisine: American
- Diet: Gluten Free
Description
A fun and spooky treat perfect for Halloween parties, this Zombie Brain Jello is gluten-free and sure to impress your guests.
Ingredients
- 1 package of raspberry gelatin
- 1 cup of boiling water
- 1 cup of cold water
- 1/2 cup of whipped cream
- 1/2 cup of gummy worms (optional)
Instructions
- In a mixing bowl, dissolve the raspberry gelatin in boiling water.
- Add cold water and mix well.
- Pour the mixture into a brain-shaped mold.
- Refrigerate for at least 4 hours or until fully set.
- Once set, carefully remove the jello from the mold.
- Top with whipped cream and gummy worms for decoration.
Notes
- Make sure to use gluten-free gelatin.
- For a more intense flavor, consider adding a splash of fruit juice.
- This treat can be made a day in advance.
Nutrition
- Serving Size: 1 serving
- Calories: 80
- Sugar: 15g
- Sodium: 50mg
- Fat: 0g
- Saturated Fat: 0g
- Unsaturated Fat: 0g
- Trans Fat: 0g
- Carbohydrates: 20g
- Fiber: 0g
- Protein: 1g
- Cholesterol: 0mg