
Rice Krispie Pumpkins
As the leaves turn and the air gets crisp, I find myself craving the fun of Halloween. What better way to celebrate than with delightful Rice Krispie Pumpkins? These treats are not just easy to whip up; they’re a fantastic way to involve the kids in the kitchen. I remember making these with my little ones, their laughter filling the room as we shaped the pumpkins together. This recipe is perfect for busy days when you want to create something special without spending hours in the kitchen. Plus, they’re a hit at any Halloween gathering!
Why You’ll Love This Rice Krispie Pumpkins
These Rice Krispie Pumpkins are a dream come true for busy moms and professionals alike. They come together in just 25 minutes, making them a quick and delightful treat. The sweet, gooey marshmallow combined with the crispy cereal creates a taste that’s simply irresistible. Plus, they’re a fun way to get the kids involved, turning a simple recipe into a cherished family memory. Who wouldn’t love that?
Ingredients for Rice Krispie Pumpkins
Gathering the right ingredients is half the fun! Here’s what you’ll need to create these adorable Rice Krispie Pumpkins:
- Butter: This is the base for your marshmallow mixture, adding richness and flavor.
- Marshmallows: The star of the show! They melt down to create that gooey goodness we all love.
- Rice Krispies cereal: These crispy little gems provide the perfect crunch and texture.
- Orange food coloring: A few drops will transform your mixture into vibrant pumpkin hues.
- Green candy melts or chocolate: These will be used for the stems, adding a cute finishing touch.
- Wax paper: Essential for setting your pumpkins without sticking.
For a little extra flair, consider adding chocolate chips or candy eyes for decoration. You can find all these ingredients at your local grocery store, and if you’re feeling adventurous, try swapping the Rice Krispies for a gluten-free cereal. Exact quantities are available at the bottom of the article for easy printing!
How to Make Rice Krispie Pumpkins
Now that you have your ingredients ready, let’s dive into the fun part—making these adorable Rice Krispie Pumpkins! Follow these simple steps, and you’ll have a batch of festive treats in no time.
Step 1: Melt the Butter
Start by placing a large saucepan over low heat. Add the butter and let it melt slowly. Stir occasionally to ensure it doesn’t burn. The goal is to have a smooth, melted base for your marshmallows.
Step 2: Add Marshmallows
Once the butter is melted, it’s time to add the marshmallows. Pour them into the saucepan and stir continuously. Keep stirring until the marshmallows are completely melted and the mixture is smooth. This gooey goodness is what makes Rice Krispie Treats so special!
Step 3: Color the Mixture
Remove the saucepan from heat. Now, add a few drops of orange food coloring to the melted marshmallow mixture. Stir well until the color is evenly distributed. You want a vibrant orange that screams Halloween!
Step 4: Combine with Rice Krispies
Next, it’s time to add the Rice Krispies cereal. Pour it into the saucepan and gently fold it into the marshmallow mixture. Make sure every piece of cereal is well coated. This step is crucial for that perfect crunch!
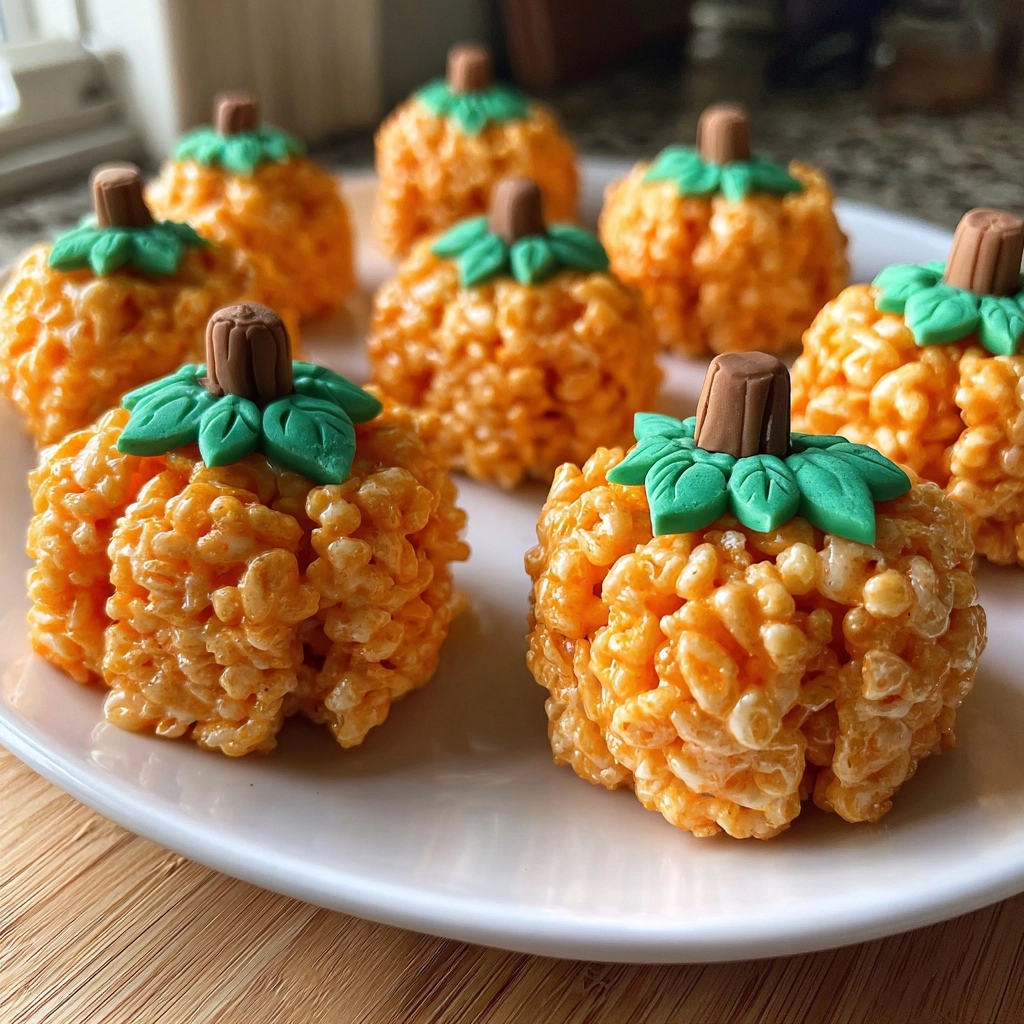
Step 5: Shape the Pumpkins
🚫 Don’t Buy This If…
- ❌ You hate hosting fun parties
- ❌ You don’t like saving time in the kitchen
- ❌ You only want boring, basic recipes
✅ What You’ll Get:
- ✅ 63 spooky & delicious Halloween recipes
- ✅ Creepy treats, eerie snacks, scary drinks & more
- ✅ Kid-friendly & adult-approved
- ✅ 📥 Instant digital download – start cooking today!

Let the mixture cool for a few minutes, just until it’s safe to handle. Then, take small handfuls and shape them into pumpkin forms. You can make them as big or small as you like. Just remember, the more fun shapes, the better!
Step 6: Create Stems
Now, let’s add some character! Melt the green candy melts or chocolate in a microwave-safe bowl. Once melted, use a spoon to drizzle or shape the melted candy on top of each pumpkin to create cute little stems. This is where your creativity can shine!
Step 7: Set the Pumpkins
Finally, place your Rice Krispie Pumpkins on a sheet of wax paper. This will prevent them from sticking as they set. Allow them to cool completely, and watch as they transform into delightful Halloween treats!
Tips for Success
- Use fresh marshmallows for the best texture and flavor.
- Don’t rush the melting process; low heat is key to avoid burning.
- Wet your hands slightly when shaping the pumpkins to prevent sticking.
- Experiment with different colors for fun variations!
- Store leftovers in an airtight container to keep them fresh.
Equipment Needed
- Large saucepan: A non-stick option works best to prevent sticking.
- Wooden spoon: Perfect for stirring the melted mixture.
- Microwave-safe bowl: For melting the green candy melts or chocolate.
- Wax paper: Essential for setting your pumpkins without mess.
Variations
- Chocolate Rice Krispie Pumpkins: Swap out some of the Rice Krispies for chocolate cereal for a delicious twist.
- Nut-Free Option: Ensure your cereal and candy melts are nut-free for a safe treat for kids with allergies.
- Vegan Version: Use vegan marshmallows and dairy-free butter to make these treats suitable for a vegan diet.
- Gluten-Free Treats: Substitute Rice Krispies with a gluten-free cereal to accommodate gluten sensitivities.
- Spiced Pumpkin Flavor: Add a pinch of pumpkin spice to the marshmallow mixture for a seasonal flavor boost.
Serving Suggestions
- Pair your Rice Krispie Pumpkins with a warm cup of apple cider for a cozy fall treat.
- Serve them on a festive platter surrounded by candy corn for a colorful display.
- For a fun twist, add a scoop of vanilla ice cream on the side.
- Use Halloween-themed napkins and plates to enhance the festive spirit.
FAQs about Rice Krispie Pumpkins
Can I make Rice Krispie Pumpkins ahead of time?
Absolutely! You can prepare these treats a day in advance. Just store them in an airtight container to keep them fresh. They’ll be ready to impress your guests when you need them!
What can I use instead of green candy melts?
If you can’t find green candy melts, melted chocolate works perfectly too! You can even use colored icing for a fun twist. Get creative with what you have on hand!
How do I store leftover Rice Krispie Pumpkins?
Keep any leftovers in an airtight container at room temperature. They’ll stay fresh for up to three days. Just be sure to separate layers with wax paper to prevent sticking.
Can I customize the colors for different occasions?
Are Rice Krispie Pumpkins suitable for kids with allergies?
To make them allergy-friendly, check the labels on your ingredients. You can find nut-free and gluten-free options for the cereal and candy melts. Always double-check to ensure safety!
Summarizing the Joy of Making Rice Krispie Pumpkins
Creating Rice Krispie Pumpkins is more than just a recipe; it’s a delightful experience that brings families together. The laughter shared while shaping these treats is a memory in the making. Each colorful pumpkin is a testament to creativity and fun, perfect for Halloween celebrations. As you watch your loved ones enjoy these sweet bites, you’ll feel a warm glow of satisfaction. This simple treat not only satisfies a sweet tooth but also fosters connection and joy in the kitchen. So, roll up your sleeves and dive into this festive adventure!
Print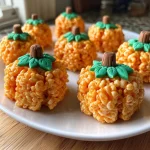
Rice Krispie Pumpkins: Easy Treats for Halloween Fun!
- Prep Time: 15 minutes
- Cook Time: 10 minutes
- Total Time: 25 minutes
- Yield: 12 pumpkins 1x
- Category: Dessert
- Method: Stovetop
- Cuisine: American
- Diet: Vegetarian
Description
Delicious and fun Rice Krispie Pumpkins perfect for Halloween celebrations.
Ingredients
- 3 tablespoons butter
- 1 package (10 oz) marshmallows
- 6 cups Rice Krispies cereal
- Orange food coloring
- Green candy melts or chocolate for stems
- Wax paper
Instructions
- In a large saucepan, melt the butter over low heat.
- Add the marshmallows and stir until completely melted.
- Remove from heat and add a few drops of orange food coloring, mixing until the desired color is achieved.
- Stir in the Rice Krispies cereal until well coated.
- Let the mixture cool slightly, then shape into pumpkin shapes.
- Melt the green candy melts or chocolate and use it to create stems on top of the pumpkins.
- Place the pumpkins on wax paper to set.
Notes
- For added decoration, use chocolate chips or candy eyes.
- Store in an airtight container for up to 3 days.
Nutrition
- Serving Size: 1 pumpkin
- Calories: 150
- Sugar: 10g
- Sodium: 50mg
- Fat: 5g
- Saturated Fat: 3g
- Unsaturated Fat: 2g
- Trans Fat: 0g
- Carbohydrates: 22g
- Fiber: 0g
- Protein: 1g
- Cholesterol: 10mg