Graveyard Pudding Cups
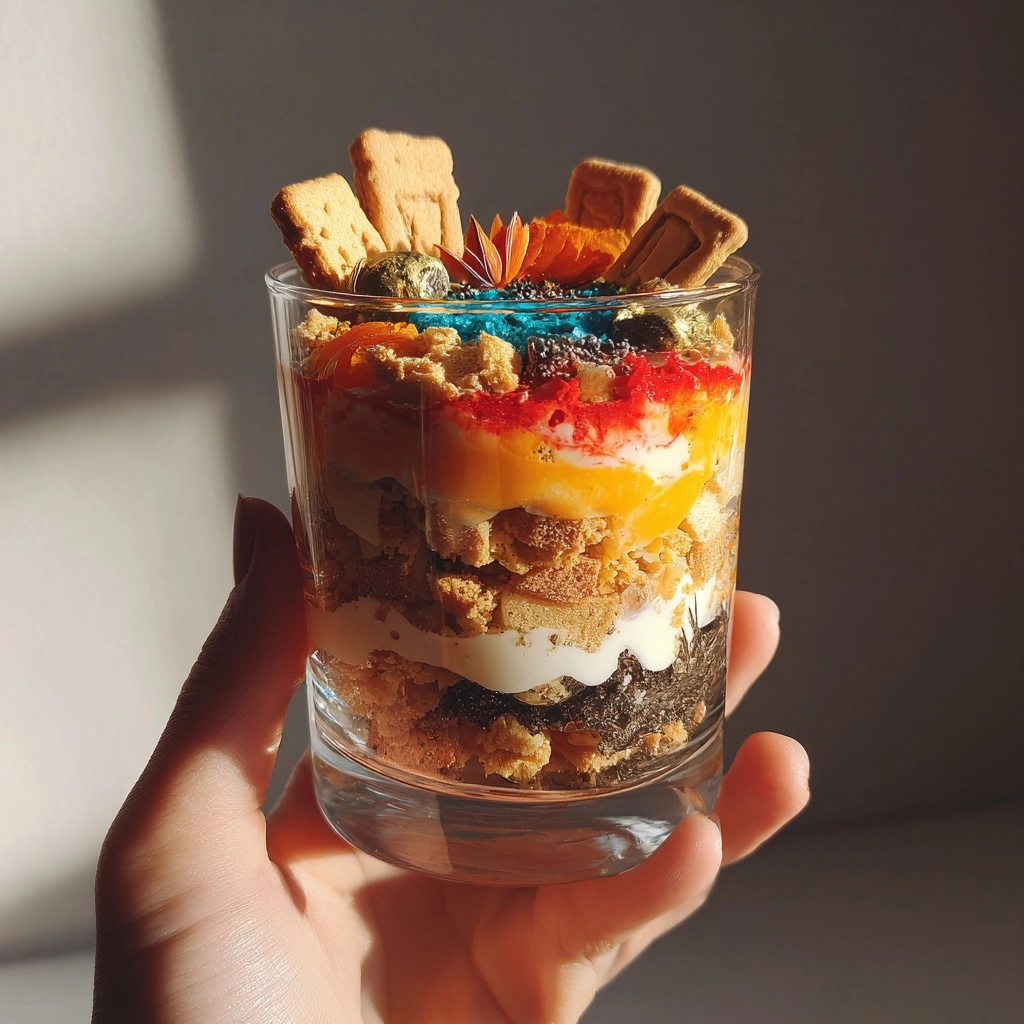
As the leaves turn and the air gets crisp, I find myself dreaming up spooky treats for Halloween. One of my absolute favorites is Graveyard Pudding Cups. These delightful little desserts are not only fun to make, but they also bring a smile to everyone’s face. Perfect for busy moms like us, they require minimal effort and no baking! Just imagine layering creamy chocolate pudding with crushed cookies and gummy worms. It’s a quick solution for a festive gathering or a sweet surprise for your loved ones. Trust me, these cups will be the highlight of your Halloween celebrations!
Why You’ll Love This Graveyard Pudding Cups
Graveyard Pudding Cups are a breeze to whip up, making them perfect for our busy lives. With just a few simple ingredients, you can create a dessert that’s both delicious and visually appealing. The layers of chocolate pudding and crushed cookies offer a delightful texture, while the gummy worms add a playful touch. Plus, they can be made ahead of time, giving you more moments to enjoy with your family and friends!
Ingredients for Graveyard Pudding Cups
Gathering the right ingredients is half the fun! For these Graveyard Pudding Cups, you’ll need a few simple items that you might already have in your pantry. Here’s what you’ll need:
- Chocolate pudding: The star of the show! You can use instant or cook-and-serve pudding, depending on your preference.
- Crushed chocolate sandwich cookies: These add a delightful crunch and mimic the look of dirt. Feel free to use any brand you love!
- Whipped cream: This fluffy layer brings a lightness to the dessert. You can use store-bought or whip your own for a fresher taste.
- Gummy worms: These creepy crawlers are essential for that spooky graveyard vibe. Kids love them, and they add a fun twist!
- Chocolate sprinkles: A sprinkle of these adds a little extra flair and makes the dessert even more festive.
If you want to get creative, consider adding edible decorations like candy tombstones or spooky sprinkles for an extra touch of Halloween spirit. You can find these at most grocery stores or online. For exact measurements, check the bottom of the article where you can find everything available for printing!
How to Make Graveyard Pudding Cups
Creating these Graveyard Pudding Cups is as easy as pie—well, easier actually! Follow these simple steps, and you’ll have a spooky dessert ready in no time. Let’s dive into the fun!
Step 1: Prepare the Chocolate Pudding
Start by preparing the chocolate pudding according to the package instructions. This usually involves mixing the pudding mix with milk and whisking until it thickens. Once it’s ready, let it cool for a few minutes. The rich, creamy texture is what makes these cups so delightful!
Step 2: Layer the Pudding
Grab your cups or small glasses. Begin by adding a generous layer of chocolate pudding at the bottom. This layer is the foundation of your graveyard scene. Make sure to spread it evenly for a beautiful presentation!
Step 3: Add Crushed Cookies
Next, sprinkle a layer of crushed chocolate sandwich cookies on top of the pudding. This layer mimics the look of dirt, adding a fun twist to your dessert. Don’t be shy—use enough to create a nice contrast with the pudding below!
Step 4: Top with Whipped Cream
Now, it’s time to add a fluffy layer of whipped cream. This light and airy topping balances the richness of the pudding and cookies. Use a spoon or a piping bag for a fancy touch. Who doesn’t love a little extra fluff?
Step 5: Repeat Layers
🚫 Don’t Buy This If…
- ❌ You hate hosting fun parties
- ❌ You don’t like saving time in the kitchen
- ❌ You only want boring, basic recipes
✅ What You’ll Get:
- ✅ 63 spooky & delicious Halloween recipes
- ✅ Creepy treats, eerie snacks, scary drinks & more
- ✅ Kid-friendly & adult-approved
- ✅ 📥 Instant digital download – start cooking today!

Repeat the layers until your cup is full. Start with pudding, then cookies, and finish with whipped cream. This creates a beautiful, layered effect that’s as pleasing to the eye as it is to the taste buds. Each spoonful will be a delightful surprise!
Step 6: Decorate the Cups
Here comes the fun part! Decorate the top of your cups with gummy worms and chocolate sprinkles. Let your creativity shine! You can even add edible decorations like candy tombstones for an extra spooky vibe. The more, the merrier!
Step 7: Chill Before Serving
Finally, chill your Graveyard Pudding Cups in the refrigerator for at least 30 minutes. This allows the flavors to meld together and makes the dessert even more refreshing. Plus, it gives you a moment to relax before the Halloween festivities begin!
Tips for Success
- Use a clear cup to showcase the beautiful layers of your Graveyard Pudding Cups.
- For a richer flavor, opt for dark chocolate pudding instead of regular chocolate.
- Make these cups a day in advance to save time on Halloween night.
- Experiment with different toppings like crushed candy bars or edible glitter for a unique twist.
- Don’t forget to have fun decorating—let your kids join in on the spooky creativity!
Equipment Needed
- Cups or small glasses: Clear cups work best to show off those spooky layers. You can also use mason jars for a rustic touch.
- Mixing bowl: A medium-sized bowl is perfect for mixing your pudding.
- Whisk or spoon: Use a whisk for smooth pudding, or a spoon if you prefer.
- Spatula: Great for layering and spreading the whipped cream evenly.
Variations
- Vegan Option: Substitute chocolate pudding with a plant-based version and use coconut whipped cream for a dairy-free treat.
- Gluten-Free: Use gluten-free chocolate sandwich cookies to make this dessert suitable for those with gluten sensitivities.
- Flavor Twist: Try using vanilla pudding instead of chocolate for a different flavor profile. You can also add a layer of fruit puree for a fruity surprise!
- Nutty Crunch: Add a layer of crushed nuts or granola between the layers for an extra crunch and flavor.
- Spooky Colors: Use colored pudding (like green or orange) for a fun Halloween twist that kids will love!
Serving Suggestions
- Pair your Graveyard Pudding Cups with spooky-themed cookies for a delightful dessert table.
- Serve alongside a warm apple cider or pumpkin spice latte to enhance the fall flavors.
- For a festive touch, use Halloween-themed napkins and plates to create a fun atmosphere.
- Consider adding a few decorative plastic spiders or mini pumpkins around the cups for extra flair.
FAQs about Graveyard Pudding Cups
As I’ve shared my love for these Graveyard Pudding Cups, I often get questions from fellow home cooks. Here are some of the most common queries I’ve encountered, along with my answers to help you create the perfect spooky treat!
Can I make Graveyard Pudding Cups in advance?
Absolutely! These cups can be made a day ahead. Just layer them up, cover, and refrigerate. This not only saves time but also allows the flavors to meld beautifully.
What can I use instead of chocolate pudding?
If chocolate isn’t your thing, feel free to swap it out for vanilla pudding. You can even add a layer of fruit puree for a refreshing twist!
How do I store leftovers?
Store any leftover Graveyard Pudding Cups in the refrigerator, covered. They should stay fresh for up to two days, but I doubt they’ll last that long!
Can I use different toppings?
Definitely! Get creative with your toppings. Crushed candy bars, edible glitter, or even gummy spiders can add a fun twist to your spooky dessert.
Are Graveyard Pudding Cups suitable for kids?
Yes! Kids love these fun and spooky treats. They can even help with the layering and decorating, making it a fun family activity!
Summarizing the Joy of Graveyard Pudding Cups
Creating Graveyard Pudding Cups is more than just making a dessert; it’s about crafting memories with your loved ones. The joy of layering chocolate pudding, crushed cookies, and whipped cream brings out the inner child in all of us. Watching the delight on your family’s faces as they dig into these spooky treats is priceless. Plus, the ease of preparation means you can focus on what truly matters—spending time together. So, this Halloween, let these delightful cups be a centerpiece of your celebrations, sparking laughter and joy with every delicious spoonful!
Print
Graveyard Pudding Cups: Delightful Halloween Treats!
- Prep Time: 15 minutes
- Cook Time: 0 minutes
- Total Time: 45 minutes (including chilling time)
- Yield: 4 servings 1x
- Category: Dessert
- Method: No-bake
- Cuisine: American
- Diet: Vegetarian
Description
Graveyard Pudding Cups are a fun and spooky dessert perfect for Halloween celebrations, featuring layers of chocolate pudding, crushed cookies, and gummy worms.
Ingredients
- 2 cups chocolate pudding
- 1 cup crushed chocolate sandwich cookies
- 1 cup whipped cream
- Gummy worms
- Chocolate sprinkles
Instructions
- Prepare the chocolate pudding according to package instructions and let it cool.
- In a cup or small glass, layer chocolate pudding at the bottom.
- Add a layer of crushed chocolate sandwich cookies on top of the pudding.
- Top with a layer of whipped cream.
- Repeat the layers until the cup is full.
- Decorate the top with gummy worms and chocolate sprinkles to create a graveyard effect.
- Chill in the refrigerator for at least 30 minutes before serving.
Notes
- For a more intense chocolate flavor, use dark chocolate pudding.
- Feel free to add edible decorations like candy tombstones for extra spookiness.
- These can be made a day in advance for convenience.
Nutrition
- Serving Size: 1 cup
- Calories: 250
- Sugar: 20g
- Sodium: 150mg
- Fat: 10g
- Saturated Fat: 5g
- Unsaturated Fat: 3g
- Trans Fat: 0g
- Carbohydrates: 35g
- Fiber: 2g
- Protein: 4g
- Cholesterol: 15mg

