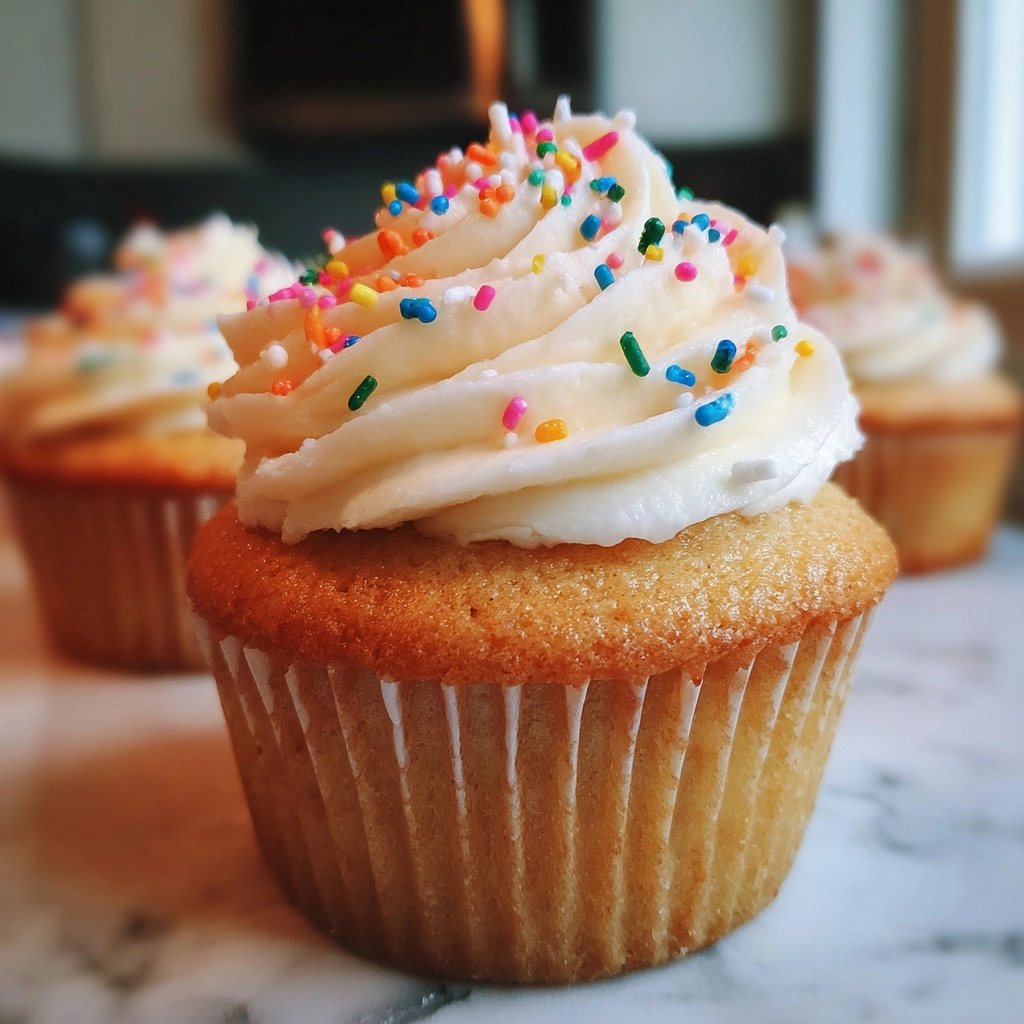
High Altitude Vanilla Cupcakes
As a busy mom, I know how precious time can be, especially when it comes to baking. That’s why I’m excited to share my recipe for High Altitude Vanilla Cupcakes. These delightful treats are not only fluffy and delicious, but they’re also designed specifically for those of us living at higher elevations. Whether you’re celebrating a birthday or just need a quick pick-me-up, these cupcakes are the perfect solution. They come together in no time and are sure to impress your loved ones with their light texture and rich vanilla flavor!
Why You’ll Love This High Altitude Vanilla Cupcakes
These High Altitude Vanilla Cupcakes are a dream come true for busy bakers like us! They’re quick to whip up, taking just 35 minutes from start to finish. The taste? Absolutely divine! With a fluffy texture and a burst of vanilla flavor, they’re perfect for any occasion. Plus, they’re designed to rise beautifully at high altitudes, so you can bake with confidence every time. What’s not to love?
Ingredients for High Altitude Vanilla Cupcakes
Gathering the right ingredients is key to baking success, especially for High Altitude Vanilla Cupcakes. Here’s what you’ll need:
- All-purpose flour: This is the backbone of your cupcakes, providing structure and stability.
- Granulated sugar: Sweetens the batter and helps create that lovely fluffy texture.
- Unsalted butter: Adds richness and moisture. Make sure it’s softened for easy creaming!
- Large eggs: They bind the ingredients together and contribute to the cupcakes’ rise.
- Milk: This adds moisture and helps create a tender crumb. You can use whole or low-fat milk.
- Vanilla extract: The star of the show! It infuses your cupcakes with a warm, inviting flavor.
- Baking powder: This leavening agent is crucial for helping your cupcakes rise perfectly at high altitudes.
- Salt: Just a pinch enhances the flavors and balances the sweetness.
For those looking to mix things up, consider adding a splash of almond extract for a unique twist or using a dairy-free milk alternative if needed. You can find the exact measurements for these ingredients at the bottom of the article, ready for printing!
How to Make High Altitude Vanilla Cupcakes
Now that you have your ingredients ready, let’s dive into the fun part: making these High Altitude Vanilla Cupcakes! Follow these simple steps, and you’ll be on your way to baking success.
Step 1: Preheat the Oven
First things first, preheat your oven to 350°F (175°C). Preheating is crucial, especially at high altitudes, as it helps your cupcakes rise properly. A hot oven ensures that the batter starts cooking immediately, creating that lovely fluffy texture we all crave.
Step 2: Cream Butter and Sugar
In a large bowl, cream together the softened butter and granulated sugar until the mixture is light and fluffy. This process is essential because it incorporates air into the batter, giving your cupcakes a delightful lift. Aim for a pale yellow color, which usually takes about 3-5 minutes of mixing.
Step 3: Add Eggs and Vanilla
Next, add the eggs one at a time, mixing well after each addition. Eggs are the magic ingredient that binds everything together and helps your cupcakes rise. Don’t forget to stir in the vanilla extract, which adds that warm, inviting flavor that makes these cupcakes irresistible!
Step 4: Combine Dry Ingredients
In a separate bowl, whisk together the all-purpose flour, baking powder, and salt. Mixing these dry ingredients separately is important because it ensures that the baking powder is evenly distributed. This step helps your cupcakes rise uniformly, especially in high-altitude baking.
Step 5: Mix Wet and Dry Ingredients
🚫 Don’t Buy This If…
- ❌ You hate hosting fun parties
- ❌ You don’t like saving time in the kitchen
- ❌ You only want boring, basic recipes
✅ What You’ll Get:
- ✅ 63 spooky & delicious Halloween recipes
- ✅ Creepy treats, eerie snacks, scary drinks & more
- ✅ Kid-friendly & adult-approved
- ✅ 📥 Instant digital download – start cooking today!

Now, it’s time to combine the wet and dry ingredients. Gradually add the dry mixture to the wet ingredients, alternating with the milk. Mix until just combined; overmixing can lead to dense cupcakes. You want to keep that light, airy texture!
Step 6: Fill Cupcake Liners
Line your cupcake pan with liners and fill them about two-thirds full with the batter. This allows enough room for the cupcakes to rise without overflowing. A handy tip is to use an ice cream scoop for even portions!
Step 7: Bake to Perfection
Place the filled cupcake pan in the preheated oven and bake for 18-20 minutes. To check for doneness, insert a toothpick into the center of a cupcake. If it comes out clean or with a few crumbs, they’re ready! Keep an eye on them, as baking times can vary.
Step 8: Cool and Frost
Once baked, remove the cupcakes from the oven and let them cool in the pan for about 5 minutes. Then, transfer them to a wire rack to cool completely. This cooling process is vital before frosting; otherwise, your frosting might melt away. Once cooled, feel free to frost them with your favorite icing!
Tips for Success
- Always use room temperature ingredients for better mixing and texture.
- Don’t skip the preheating step; it’s crucial for high altitude baking.
- Measure your flour correctly—spoon it into the cup and level it off.
- Keep an eye on your cupcakes while baking; ovens can vary.
- Let cupcakes cool completely before frosting to avoid melting.
Equipment Needed
- Mixing bowls: A set of various sizes is handy; you can use any large bowl if needed.
- Electric mixer: A hand mixer works great, but a stand mixer can save time.
- Measuring cups and spoons: Essential for accuracy; a kitchen scale is a great alternative.
- Cupcake pan: Standard or silicone pans work well for easy release.
- Cooling rack: If you don’t have one, a plate will do in a pinch!
Variations
- Chocolate Chip: Fold in mini chocolate chips for a delightful twist on the classic vanilla flavor.
- Almond Joy: Add shredded coconut and chopped almonds for a tropical flair.
- Fruit-Infused: Incorporate fresh berries or citrus zest for a burst of natural flavor.
- Dairy-Free: Substitute the milk with almond or oat milk and use dairy-free butter for a vegan option.
- Gluten-Free: Swap all-purpose flour with a gluten-free blend for a gluten-free treat.
Serving Suggestions
- Pair your High Altitude Vanilla Cupcakes with a refreshing glass of lemonade or iced tea for a delightful afternoon treat.
- Serve them alongside fresh fruit, like strawberries or raspberries, for a colorful presentation.
- For a special touch, dust with powdered sugar or drizzle with chocolate ganache before serving.
FAQs about High Altitude Vanilla Cupcakes
Can I use a different type of flour for these cupcakes?
Absolutely! While all-purpose flour is the go-to for High Altitude Vanilla Cupcakes, you can experiment with cake flour for a lighter texture. Just remember, if you switch to a gluten-free flour, you may need to adjust the liquid content.
What if my cupcakes don’t rise properly?
If your cupcakes fall flat, it could be due to too much flour or not enough leavening agent. Make sure to measure your flour correctly and check that your baking powder is fresh. High altitude baking can be tricky, but with practice, you’ll get the hang of it!
Can I make these cupcakes ahead of time?
Yes! You can bake your High Altitude Vanilla Cupcakes a day in advance. Just store them in an airtight container at room temperature. Frost them just before serving to keep the icing fresh and beautiful!
How can I store leftover cupcakes?
To keep your cupcakes fresh, store them in an airtight container at room temperature for up to three days. If you want to keep them longer, consider freezing them. Just wrap each cupcake tightly in plastic wrap and place them in a freezer-safe bag.
What’s the best way to frost my cupcakes?
For a beautiful finish, use a piping bag with your favorite frosting. If you don’t have one, a simple spatula works just as well! Feel free to get creative with toppings like sprinkles or fresh fruit to make them extra special.
Summarizing the Joy of High Altitude Vanilla Cupcakes
Baking High Altitude Vanilla Cupcakes is more than just a recipe; it’s an experience filled with joy and satisfaction. The delightful aroma wafting through your kitchen as they bake is enough to lift anyone’s spirits. Each fluffy bite is a reminder that even at high elevations, you can create something truly special. Whether you’re celebrating a milestone or simply indulging in a sweet treat, these cupcakes bring people together. So, roll up your sleeves, embrace the process, and enjoy the smiles that come with sharing these delicious creations with your loved ones!
Print
High Altitude Vanilla Cupcakes: Bake Perfectly Every Time!
- Prep Time: 15 minutes
- Cook Time: 20 minutes
- Total Time: 35 minutes
- Yield: 12 cupcakes 1x
- Category: Dessert
- Method: Baking
- Cuisine: American
- Diet: Vegetarian
Description
Delicious and fluffy vanilla cupcakes specifically designed for high altitude baking, ensuring perfect results every time.
Ingredients
- 1 1/2 cups all-purpose flour
- 1 cup granulated sugar
- 1/2 cup unsalted butter, softened
- 2 large eggs
- 1/2 cup milk
- 2 teaspoons vanilla extract
- 1 1/2 teaspoons baking powder
- 1/4 teaspoon salt
Instructions
- Preheat your oven to 350°F (175°C).
- In a large bowl, cream together the softened butter and sugar until light and fluffy.
- Add the eggs one at a time, mixing well after each addition.
- Stir in the vanilla extract.
- In a separate bowl, whisk together the flour, baking powder, and salt.
- Gradually add the dry ingredients to the wet mixture, alternating with the milk, and mix until just combined.
- Fill cupcake liners about 2/3 full with the batter.
- Bake for 18-20 minutes or until a toothpick inserted into the center comes out clean.
- Allow to cool before frosting as desired.
Notes
- For best results, use room temperature ingredients.
- Adjust baking time as needed based on your oven’s performance.
- Consider using a high-altitude baking guide for further adjustments if necessary.
Nutrition
- Serving Size: 1 cupcake
- Calories: 200
- Sugar: 15g
- Sodium: 150mg
- Fat: 8g
- Saturated Fat: 5g
- Unsaturated Fat: 2g
- Trans Fat: 0g
- Carbohydrates: 30g
- Fiber: 0g
- Protein: 2g
- Cholesterol: 30mg

