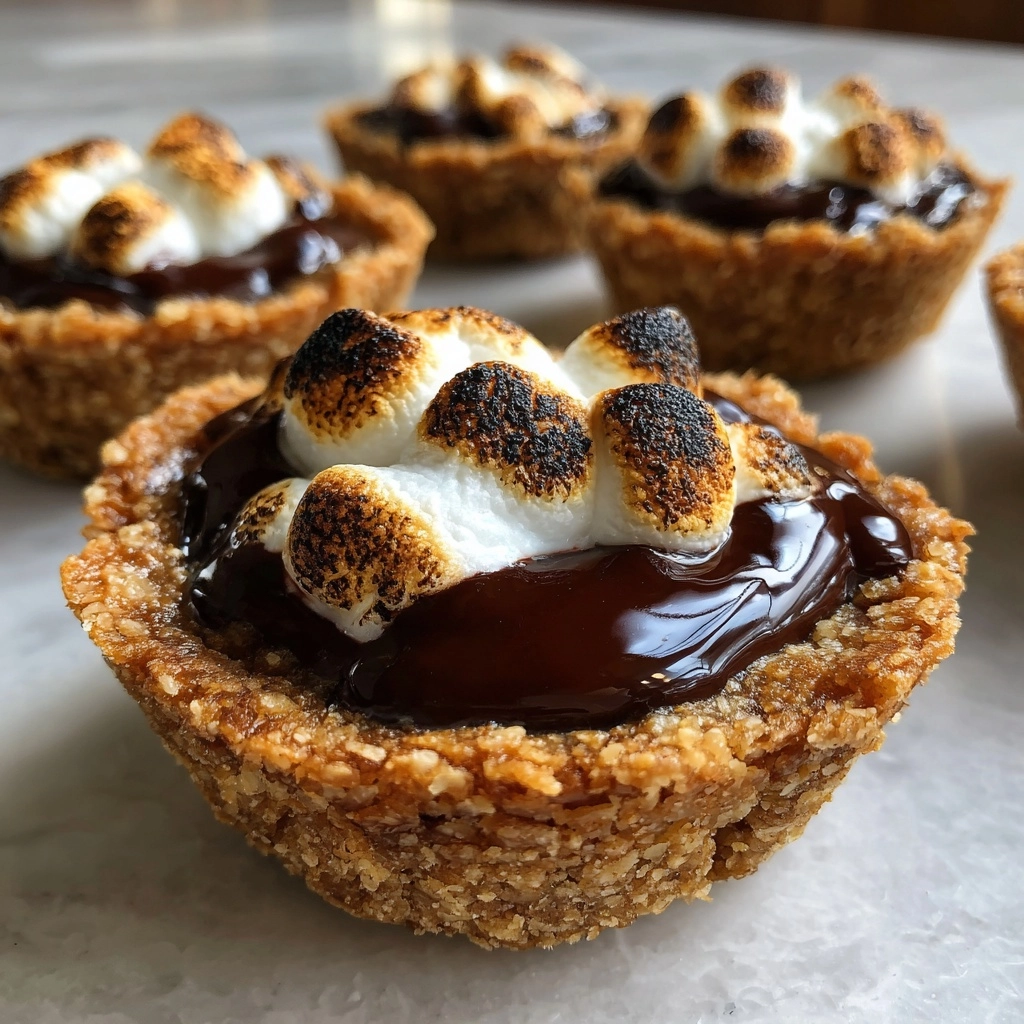
S’mores Cookie Cups – Bake & Bacon
As a busy mom, I know how precious time can be, especially when it comes to whipping up something sweet. That’s why these S’mores Cookie Cups are my go-to treat! They’re quick, easy, and oh-so-delicious, making them perfect for those hectic days when you want to impress your loved ones without spending hours in the kitchen. Imagine the joy on your family’s faces as they bite into these gooey, chocolatey delights. Trust me, these little cups of happiness will become a staple in your home, bringing smiles and sweet memories to your table!
Why You’ll Love This S’mores Cookie Cups
These S’mores Cookie Cups are a delightful blend of ease and flavor. In just 30 minutes, you can create a dessert that tastes like a campfire classic. They’re perfect for busy days when you need a quick sweet fix or a fun treat for gatherings. Plus, the combination of chocolate, marshmallows, and graham crackers will transport you back to childhood memories, making every bite a nostalgic experience!
Ingredients for S’mores Cookie Cups
Gathering the right ingredients is the first step to creating these delightful S’mores Cookie Cups. Here’s what you’ll need:
- Unsalted butter: This adds richness and helps create a tender cookie. Make sure it’s softened for easy mixing.
- Brown sugar: It gives a deep, caramel flavor and moisture to the cookie cups.
- Granulated sugar: This adds sweetness and helps with the cookie’s structure.
- Large eggs: They bind the ingredients together and provide structure, making your cookie cups fluffy.
- Vanilla extract: A splash of this adds warmth and enhances the overall flavor.
- All-purpose flour: The base of your cookie dough, providing the necessary structure.
- Baking soda: This leavening agent helps the cookie cups rise and become light.
- Salt: Just a pinch balances the sweetness and enhances the flavors.
- Chocolate chips: These are the stars of the show, adding gooey chocolate goodness in every bite.
- Mini marshmallows: They create that classic S’mores experience, adding a soft, chewy texture.
- Graham cracker crumbs: These provide the signature S’mores flavor and a bit of crunch.
For those looking to switch things up, consider using dark chocolate chips for a richer taste or even adding a sprinkle of sea salt on top for a sweet-salty twist. You can find all the exact measurements at the bottom of the article, ready for printing!
How to Make S’mores Cookie Cups
Now that you have your ingredients ready, let’s dive into the fun part—making these S’mores Cookie Cups! Follow these simple steps, and you’ll have a batch of sweet treats in no time.
Step 1: Preheat the Oven
First things first, preheat your oven to 350°F (175°C). Preheating is crucial because it ensures even baking. If you skip this step, your cookie cups might end up unevenly cooked, and nobody wants that!
Step 2: Cream the Butter and Sugars
In a large bowl, cream together the softened butter, brown sugar, and granulated sugar until smooth. This process is key to achieving a light and fluffy texture. The air you incorporate while creaming helps your cookie cups rise beautifully!
Step 3: Add Eggs and Vanilla
Next, add the eggs and vanilla extract to the mixture. The eggs bind everything together, while the vanilla adds a warm, inviting flavor. It’s like a hug for your taste buds!
Step 4: Combine Dry Ingredients
In another bowl, whisk together the all-purpose flour, baking soda, and salt. Mixing these dry ingredients separately helps ensure that the baking soda is evenly distributed. This step is essential for achieving that perfect rise!
Step 5: Mix Wet and Dry Ingredients
🚫 Don’t Buy This If…
- ❌ You hate hosting fun parties
- ❌ You don’t like saving time in the kitchen
- ❌ You only want boring, basic recipes
✅ What You’ll Get:
- ✅ 63 spooky & delicious Halloween recipes
- ✅ Creepy treats, eerie snacks, scary drinks & more
- ✅ Kid-friendly & adult-approved
- ✅ 📥 Instant digital download – start cooking today!

Now, gradually add the dry ingredients to the wet mixture. Stir gently until just combined. Be careful not to overmix; this can lead to tough cookie cups. We want them soft and chewy, not like a brick!
Step 6: Fold in Chocolate Chips and Graham Cracker Crumbs
Time to fold in the chocolate chips and graham cracker crumbs. Folding is a gentle technique that helps maintain the airiness of the dough. This is where the magic happens—those gooey chocolate pockets and crunchy bits of graham cracker will make your cookie cups irresistible!
Step 7: Prepare the Muffin Tin
Grease a muffin tin to prevent sticking. You can use cooking spray or butter. Then, scoop the cookie dough into each cup, pressing down slightly. This helps create a nice shape for your cookie cups.
Step 8: Bake the Cookie Cups
Pop the muffin tin into the oven and bake for 10-12 minutes. Keep an eye on them! You want them golden brown around the edges but still soft in the center. They’ll continue to cook a bit after you take them out.
Step 9: Add Mini Marshmallows
As soon as you remove the cookie cups from the oven, press mini marshmallows into the center of each one. This is where the gooey goodness comes in! Return them to the oven for an additional 2-3 minutes until the marshmallows are soft and slightly puffed.
Step 10: Cool and Serve
Let the cookie cups cool in the tin for a few minutes before carefully removing them. Use a butter knife to gently loosen the edges if needed. Once they’re cool enough to handle, dig in and enjoy your delicious S’mores Cookie Cups!
Tips for Success
- Make sure your butter is softened for easy mixing.
- Don’t skip the preheating step; it’s crucial for even baking.
- Use a cookie scoop for uniform cookie cups.
- Keep an eye on baking time to avoid overcooking.
- Experiment with different chocolate types for unique flavors.
Equipment Needed
- Muffin tin: A standard 12-cup muffin tin works best, but you can use silicone molds for easy removal.
- Mixing bowls: Use a large bowl for wet ingredients and a medium bowl for dry ingredients.
- Whisk and spatula: Essential for mixing and folding ingredients smoothly.
- Measuring cups and spoons: Accurate measurements ensure perfect results.
Variations of S’mores Cookie Cups
- Nutty Delight: Add chopped nuts like walnuts or pecans for a crunchy twist.
- Peanut Butter Swirl: Mix in some creamy peanut butter for a rich, nutty flavor.
- Gluten-Free Option: Substitute all-purpose flour with a gluten-free blend for a safe treat.
- Vegan Version: Use coconut oil instead of butter and flax eggs for a plant-based alternative.
- Minty Fresh: Add a few drops of peppermint extract for a refreshing minty flavor.
Serving Suggestions for S’mores Cookie Cups
- Pair with a scoop of vanilla ice cream for a delightful contrast.
- Serve alongside a warm cup of hot chocolate for a cozy treat.
- Drizzle with chocolate sauce for an extra touch of sweetness.
- Garnish with crushed graham crackers for added crunch.
FAQs about S’mores Cookie Cups
Can I make S’mores Cookie Cups ahead of time?
Absolutely! You can prepare the cookie dough in advance and store it in the fridge for up to 24 hours. Just scoop it into the muffin tin when you’re ready to bake. This makes it a great option for busy days!
What can I use instead of mini marshmallows?
If you can’t find mini marshmallows, you can cut regular marshmallows into smaller pieces. Alternatively, try using marshmallow fluff for a different texture. Just be sure to adjust the baking time accordingly!
How do I store leftover S’mores Cookie Cups?
Store your S’mores Cookie Cups in an airtight container at room temperature for up to three days. If you want to keep them longer, consider freezing them. Just thaw before enjoying!
Can I use different types of chocolate?
Definitely! Feel free to experiment with dark chocolate, milk chocolate, or even white chocolate chips. Each type will give your cookie cups a unique flavor profile, so have fun with it!
Are S’mores Cookie Cups suitable for a gluten-free diet?
Yes! You can easily make these cookie cups gluten-free by substituting all-purpose flour with a gluten-free flour blend. Just make sure to check the other ingredients for gluten content as well.
Summarizing the Joy of S’mores Cookie Cups
There’s something magical about S’mores Cookie Cups that brings people together. Each bite is a delightful reminder of summer nights spent around the campfire, filled with laughter and warmth. These cookie cups are not just a treat; they’re a way to create sweet memories with family and friends. Whether you’re celebrating a special occasion or simply enjoying a cozy evening at home, these little delights will surely bring smiles to your loved ones’ faces. So, roll up your sleeves, gather your ingredients, and let the joy of baking fill your kitchen with love and happiness!
Print
S’mores Cookie Cups: Bake & Bacon for Sweet Bliss!
- Prep Time: 15 minutes
- Cook Time: 15 minutes
- Total Time: 30 minutes
- Yield: 12 cookie cups 1x
- Category: Dessert
- Method: Baking
- Cuisine: American
- Diet: Vegetarian
Description
Delicious S’mores Cookie Cups filled with chocolate and marshmallows, perfect for a sweet treat.
Ingredients
- 1 cup unsalted butter, softened
- 1 cup brown sugar
- 1/2 cup granulated sugar
- 2 large eggs
- 1 teaspoon vanilla extract
- 2 1/2 cups all-purpose flour
- 1 teaspoon baking soda
- 1/2 teaspoon salt
- 1 cup chocolate chips
- 1 cup mini marshmallows
- 1 cup graham cracker crumbs
Instructions
- Preheat the oven to 350°F (175°C).
- In a large bowl, cream together the butter, brown sugar, and granulated sugar until smooth.
- Add the eggs and vanilla extract, mixing well.
- In another bowl, whisk together the flour, baking soda, and salt.
- Gradually add the dry ingredients to the wet ingredients, mixing until just combined.
- Fold in the chocolate chips and graham cracker crumbs.
- Grease a muffin tin and scoop the cookie dough into each cup, pressing down slightly.
- Bake for 10-12 minutes or until golden brown.
- Remove from the oven and immediately press mini marshmallows into the center of each cookie cup.
- Return to the oven for an additional 2-3 minutes until the marshmallows are soft.
- Let cool before removing from the muffin tin.
Notes
- For a richer flavor, use dark chocolate chips.
- Store in an airtight container for up to 3 days.
- Can be topped with chocolate drizzle for extra sweetness.
Nutrition
- Serving Size: 1 cookie cup
- Calories: 200
- Sugar: 15g
- Sodium: 150mg
- Fat: 10g
- Saturated Fat: 6g
- Unsaturated Fat: 4g
- Trans Fat: 0g
- Carbohydrates: 25g
- Fiber: 1g
- Protein: 2g
- Cholesterol: 30mg

